This post contains affiliate links which means if you click on a link and make a purchase, I will receive a small commission at no additional cost to you. Thank you for your support!
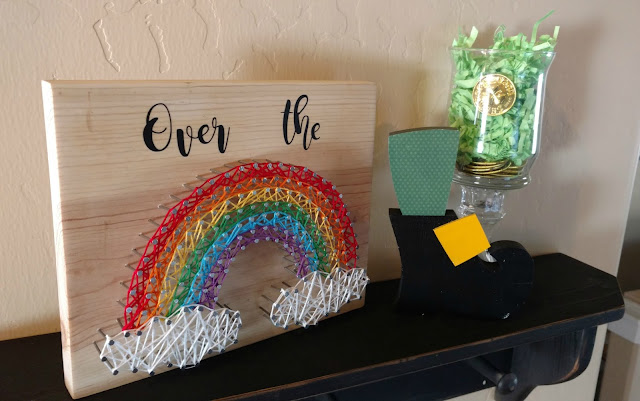
I went back and forth on what I wanted to do. I did sketches, looked at images on Google and finally settled on a rainbow because there are really only so many images that go along with St. Patrick's Day.
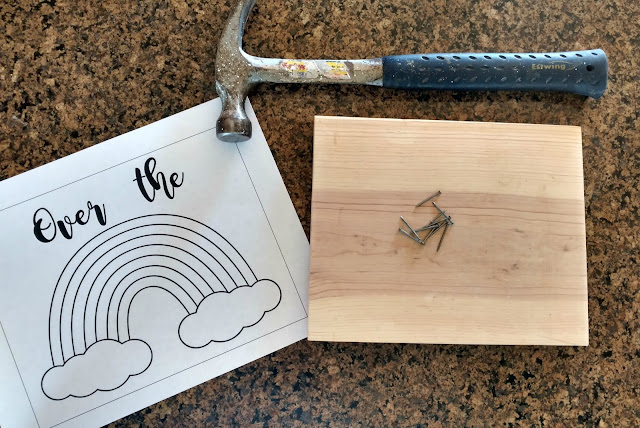
Here's a list of the supplies you'll need to make your own:
- piece of wood, desired size
- 1" nails
- hammer
- embroidery floss, desired colors
- outline of image (printed out)
- vinyl for wording (optional)
- acrylic paint (optional)
To start, I had my husband cut a piece of wood for me from a scrap piece we had lying around. I used a 2x6 and cut it so it was 7" tall x 9" long. (Seriously, why don't they call it a 2x7?) Sand down the edges for a cleaner look and wipe off all the dust. I found an outline of a rainbow with clouds that I liked, saved the image, opened it in a word document and printed it out. When selecting my rainbow image, I counted the number of arches so that I could have six colors (I left out indigo).
(Originally, I had planned on painting it my wood, but I got a little ahead of myself and started putting nails in. Once I realized this, I was about half way done nailing and didn't want to take it all out and start over. So if you're going to paint it, definitely make sure you do it before you get too far.)
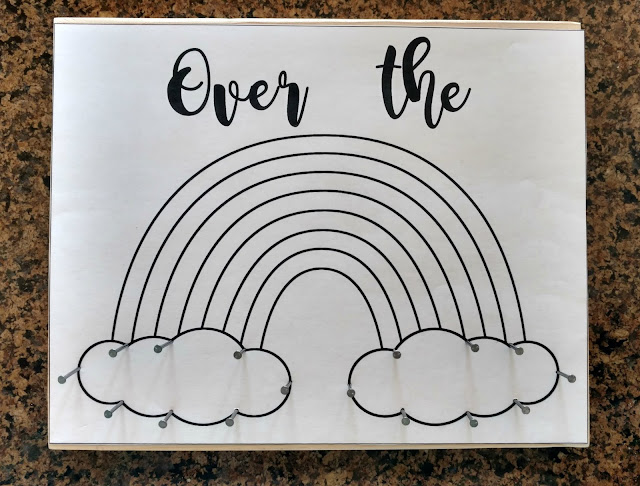
Next, I cut the paper so it would be the same size as my piece of wood. Then I grabbed a couple of nails and hammered them in on opposite sides to keep the paper from moving.
I started with the clouds. I put a nail at each of the points and then filled it in from there, trying to space them as evenly as possible--probably about 1/4".
From there I moved on to the curve of the rainbow, continuing to space the nails about 1/4" apart.
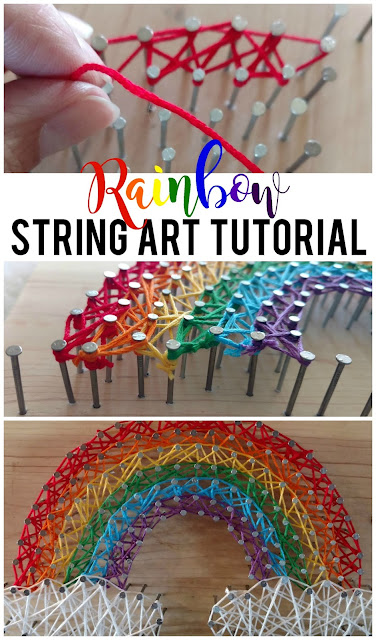
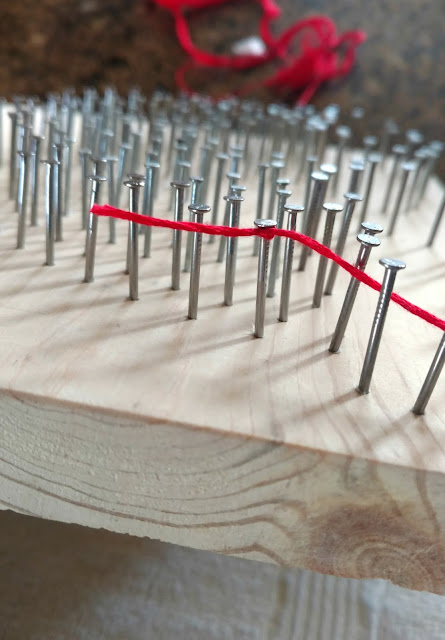
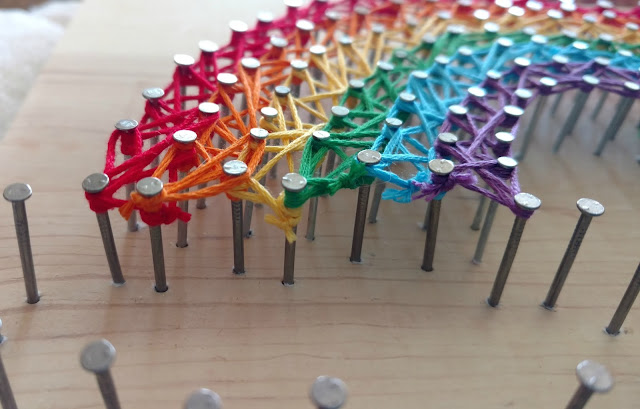
Now you grab your first color of embroidery floss and tie it on to the nail that will be your starting point. I started with the red for the first arch of the rainbow because I wanted the white of the clouds to cover all of the ends of each color. I wrapped the floss all the way around each nail at the top of the arch so I had a straight line, then I started randomly looping the floss between the first and second row of nails until I got back to the beginning. I tied it off by tying it to the tail of the string I started with. I continued this until I got all the way through each of the colors of the rainbow.
When I got to the clouds, I tied the string to a nail, wrapped it all the way around each nail so I had an outline and then started randomly looping the floss until it had the same type of coverage that the arches had.
Since I was left with space at the top of the rainbow, I decided to add some vinyl that said "Over the". I designed the words in my Silhouette Studio software and cut them using black adhesive vinyl on my Silhouette Cameo.
And that's it! This project cost me nothing since I already had everything I needed at home, but even then, it is a fairly inexpensive project since embroidery floss and a package of nails are a dollar or less for each.
Have you tried string art before? What image would you want to create?







Gahhhh this is so so cute!!
ReplyDeleteOh how I love this!! I've put together one string art and it was super simple. It's just arrows but it was a ton of fun to create.
ReplyDeleteI love it! It came out so cute.
ReplyDeleteThis is so cool! I made a heart "string" art, but used yarn instead. I would have never thought to use embroider floss!! Your rainbow turned out so cute!!
ReplyDeleteI love this!! I have always wanted to try to make one! You just inspired me to try!
ReplyDeleteThat is so pretty and I'd love to make one of these!
ReplyDeleteThis is adorable!! And perfect for St Patrick's Day!
ReplyDeleteThat's so awesome! I wish I was this crafty.
ReplyDeleteThis is seriously SO amazing Shani (could you make me some string art??), I really can't believe that this is the first time you've done string art! I've been really wanting to try but I'm afraid I'll go though all that work and then it will look awful, lol.
ReplyDeleteOh my! This is sooo cool. I would love to do this one day....I've never seen something like this and I'm so impressed. I want to make one too. Hopefully, i have the time. great post!
ReplyDeletewww.aprilwashere.com
This looks like such a fun activity.
ReplyDelete<3 I love this!! Looks so easy to do! The end product is super fun!
ReplyDeletehow cool is this!!? and first time?! my fist time would be too embarrassing to share haha!
ReplyDeleteReally Cute! I've never tried string art before!
ReplyDeleteLove this. I want to try it!
ReplyDeleteWOWZA! This rainbow is just the cutest!
ReplyDelete