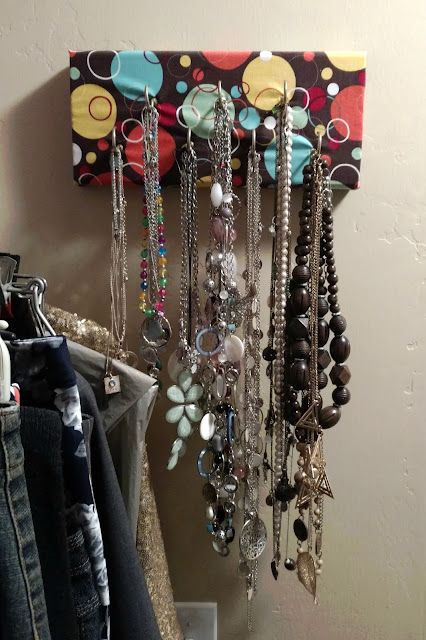
To utilize the wall space in our closet, I made a quick necklace holder using a piece of scrap wood, some fabric, nails, hooks and a sawtooth hanger to hang it on the wall. It's been totally functional and a great way to organize my necklaces but over the last few months, I decided I wanted to change it more to fit my current style. You can see what my original necklace hanger looks like below. Not bad right? But not great.
So off I went to Hobby Lobby to find some cute drawer knobs. I watched for them to go on sale (yay for 50% off!) and found 6 that I thought went together without being too matchy-matchy. If you've ever looked at the knobs and pulls they have at Hobby Lobby, you know that they have an awesome variety, but in my case, this actually made it so much harder for me to choose. Besides choosing coordinating knobs, they also had to have a big enough space between the end of the knob and the screw in part to hold the necklaces. I'm not kidding when I say that I spent a solid 45 minutes looking at knobs. My kids were going crazy of course: "Don't touch that! Put that back! No, don't put it in your mouth. Please, get off the ground!" (Anyone else?) Total I ended up spending $14 for the knobs. I also bought a small bottle of white chalk paint since I wanted to distress it a bit.
Once home, I put the bag in my craft room and there it sat for a good 2 months until I was cleaning out my closet and found it again, still in the bag on the floor. (Haha, this is the story of my life when it comes to crafts.) I finally got around to making my new necklace holder and it only took me about an hour, including dry time!
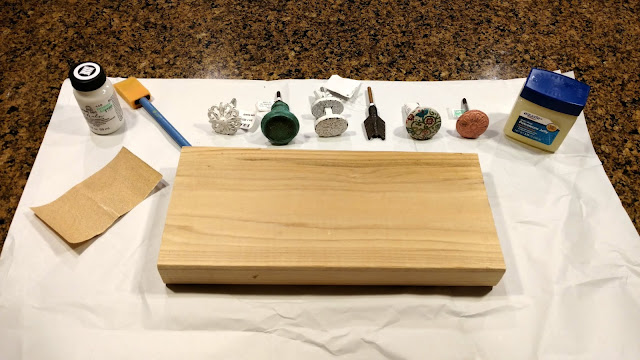
Here's what you'll need to make your own:
- a piece of scrap wood
- sandpaper
- chalk paint (or acrylic paint)
- foam brush
- petroleum jelly (for distressing)
- knobs (I used 6)
- power drill (optional)
- 1/4" drill bit (optional)
- paper
- pencil
- sawtooth hanger
- nails
Cut your wood down to size or find a piece of scrap wood that happens to be lying around your house from previous projects. Mine is 12"x5" but yours may vary depending on how many knobs you want to use and how many necklaces you need it to hold. Also, be aware that you'll want to use a thicker piece of wood since the part of the knob that gets screwed in is about 1 1/2" long. If you use a thinner piece of wood you'll run into a problem when you try to hang it on the wall since the end will be poking out the back.
Sand the cut edges so they are smoother. How much you sand is completely up to you. I just went until the edges were slightly rounded and when I ran my hand over it, I didn't come away with any splinters.
The next step is optional, depending on if you want to distress your wood or not. I did a tutorial a while back about how to distress wood using petroleum jelly. It's a technique I use all the time because it's less messy than painting first and then sanding it down. You can also do it in layers if you want multiple colors on your wood. Find the full tutorial HERE.
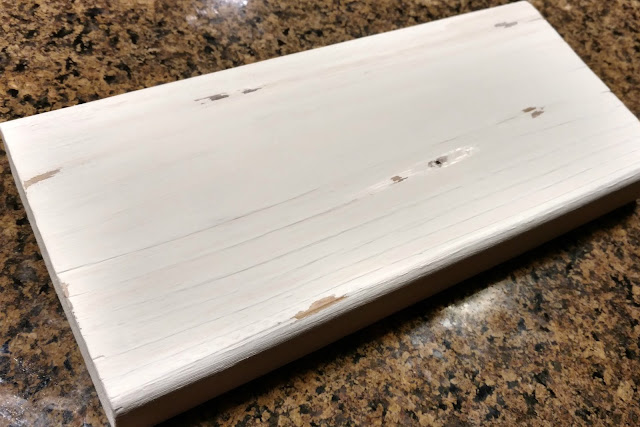
Grab your petroleum jelly and rub a small amount in random places on your board, paying close attention to the grain of the wood, as this will help the distressing look more natural. You can see where I added mine because it's a little bit shiny.
Next, paint your board using a foam brush. You can paint right over the top of the petroleum jelly. I only painted the front, top, bottom and sides since no one will see the back. Let it dry.
Once dry, use a paper towel and gently rub over the places where you put the petroleum jelly. It will rub right off! So much easier than using sandpaper and getting dust all over the place. Again, see the full tutorial for more details.
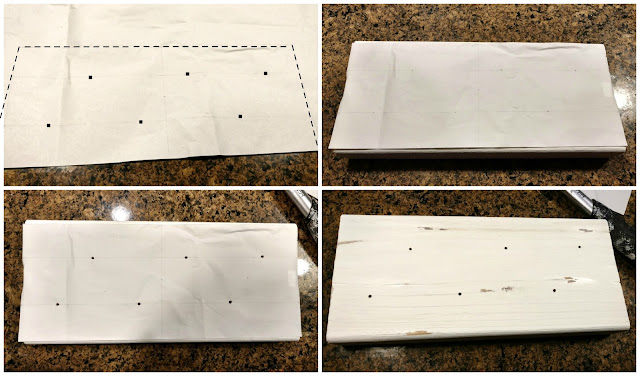
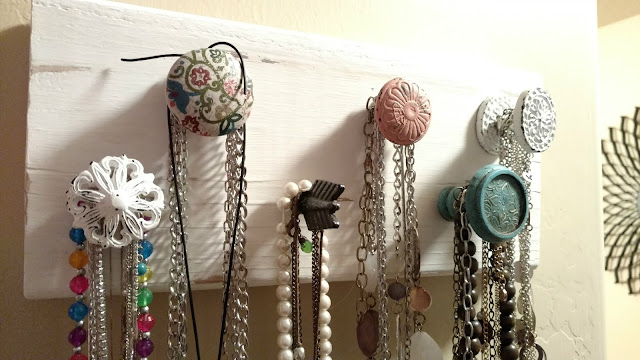
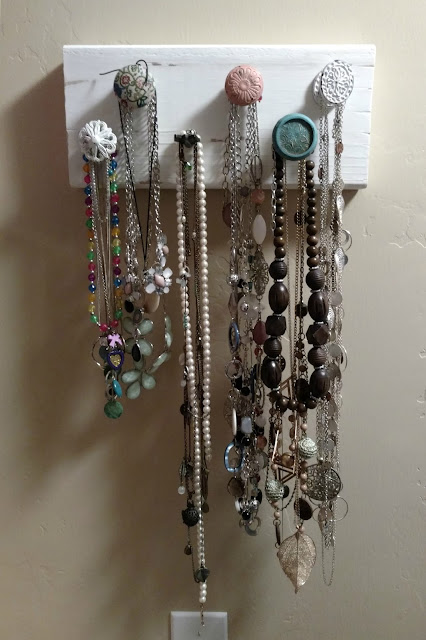
Now it's time to measure and mark the placement of the knobs. I used 6 knobs and staggered them so each row is off center and the middle two knobs split the center. First, I measured the exact center of the board. Then I measured the length of the board and tried to figure out how much space I wanted between each knob. This was actually a little trickier than I originally thought it would be so I got a piece of paper out, measured out the size of my wood and then used that to figure out the placement of each hole. Then I cut it out, placed it over my wood as a template and taped it down before pre-drilling my holes. So much easier than trying to make marks on my painted wood and I got it exactly straight!
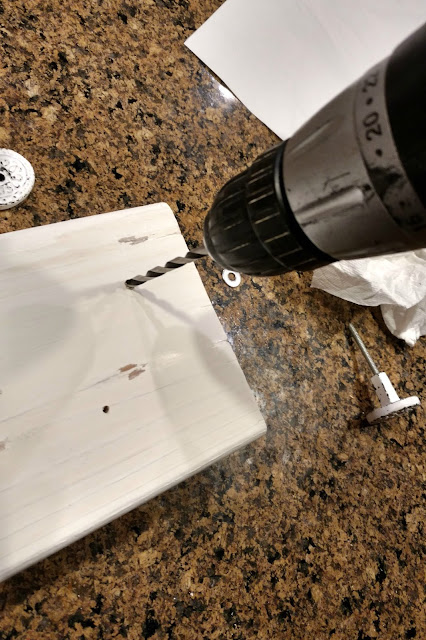
I always try to "pre-drill" my holes to make it easier on myself. You'll find that drawer knobs are flat on the end and getting the hole started will save you time and you don't have to use your muscles as much. *wink* I used a hammer and nail to get the placement right, removed the template and then I grabbed my husband's power drill and a 1/4" bit and pre-drilled about 3/4 of the way down.
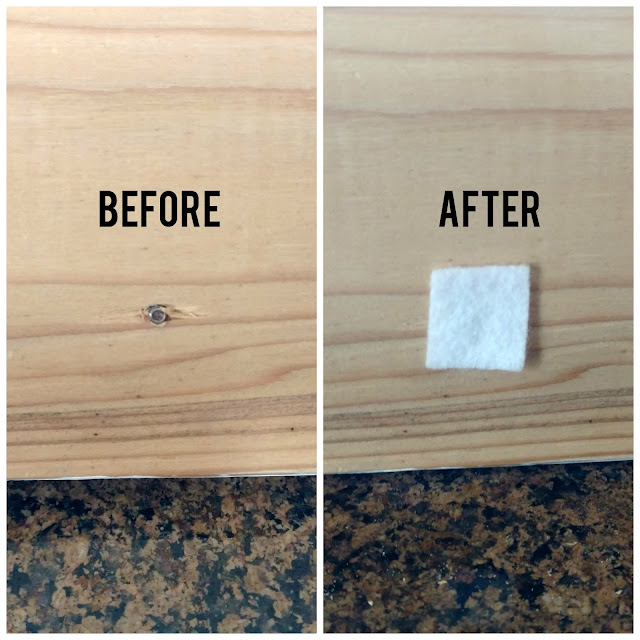
I had one knob where the end was just slightly longer than my wood was deep so I ended up drilling a hole all the way through. It poked out the back a little so I got a small piece of felt and glued it to the back of the board to cover the end of the screw so it won't scratch my wall.
Next, I decided what order I wanted my knobs to be in and then started screwing them in. Each of my knobs came with a nut and washer on the end. I didn't need the nut but I kept the washer on.
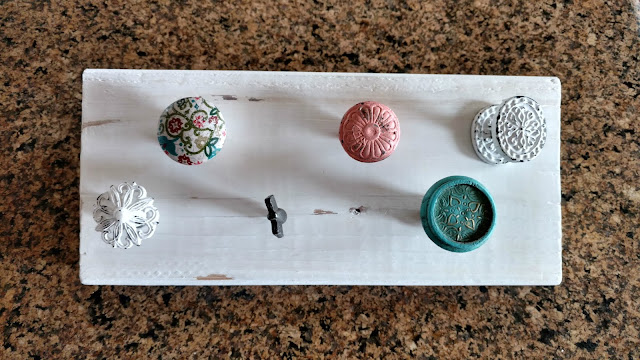
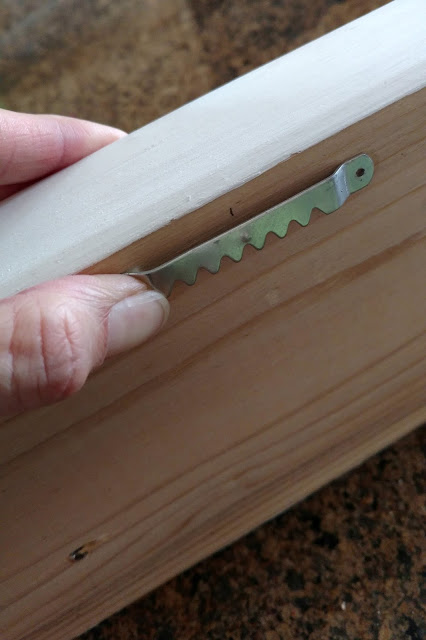
Lastly, grab your sawtooth hanger, measure the center of the board (on the back) and down about 1/2" and then nail it in. Get another nail for the wall where you want to hang it up, hammer it in and then hang your new necklace holder. Easy peasy!
I love my new necklace hanger! It makes me so happy when I walk in and see it. One thing (among many) that I love about this project is that it's completely personalized. Plus, it's pretty enough that you could hang it up in your room if you want and it will look nice on the wall and won't take up space on your dresser. Win-win!
What do you use to store your different pieces of jewelry?





What a cute DIY! I would love to do gold knobs for mine.
ReplyDeleteGold would be so cute Linh!
DeleteOMG! That is so awesome and looks easy enough that I might even be able to figure it out lol! I especially love the mismatched vintage looking knobs!
ReplyDeleteIt's a super simple DIY that makes a huge difference in my necklace organization. Plus, it's cute! The knobs are my favorite part for sure.
DeleteIt turned out so cute!! I love the selection of knobs at hobby lobby. So many to choose from. I was just there today actually :)
ReplyDeleteI just can't stay away, haha! Hobby Lobby just has everything I could ever want when it comes to crafting.
DeleteThis is such a great idea! Thanks for sharing!
ReplyDeleteThank you Taylor!
DeleteI have been wanting to do this for a while now! Thank you for sharing :)
ReplyDeleteOh, awesome! Well it's definitely an easy DIY that shouldn't take more than an hour from start to finish. I love walking into my closet and seeing it. :)
DeleteThis is such a cute project and turned out great! I did this in my room as well. I have way to much jewelry! I love the petroleum trick, never though of that and no mess #winning. Thanks for sharing!
ReplyDeletexx
Thank you Lauren! And yes, the petroleum is one of my favorite little crafting hacks. Glad you found it helpful too!
DeleteCute, simple, and functional -- the best type of project!!
ReplyDeleteAmen Lora! They are usually the only types of projects I have time for anymore.
DeleteIsn't it amazing when hobby lobby has 50% off knobs! They end up being like $1 to $2 a piece which is insane! I love how it turned out! All the different knobs are so pretty!
ReplyDeleteYES! I probably spent a little more on knobs than I should have but they were just so pretty that I couldn't help it, haha. ;)
DeleteThis is such a cute little DIY! Thank you for sharing! :)
ReplyDeleteXO, Vanessa
Thank you Vanessa!
DeleteLove this! How thick would you say your board is?
ReplyDelete