The recipe for these cookies is actually one that I shared over a year ago during Christmas time. I called it "My FAVORITE Roll and Cut Cookies" because they are the same cookies I've been making for as long as I can remember and they are amazing. They hold their shape well and aren't brittle so they can hold up to frosting and decorating. The frosting recipe that I use can also be found in the same recipe, along with tips for how to avoid the dough sticking to the rolling pin and recognizing the perfect frosting consistency.
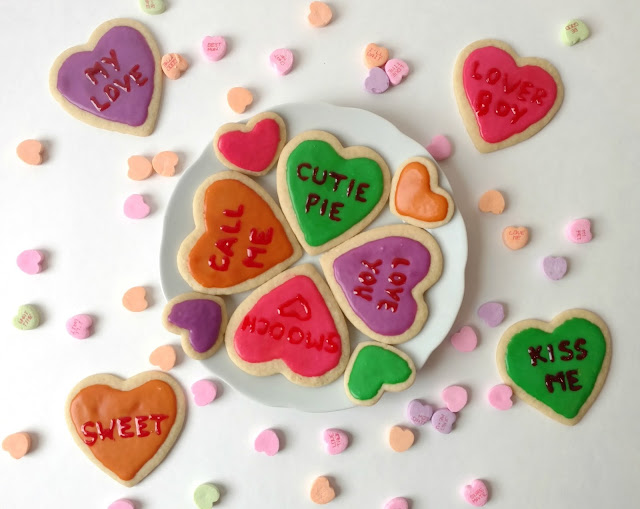
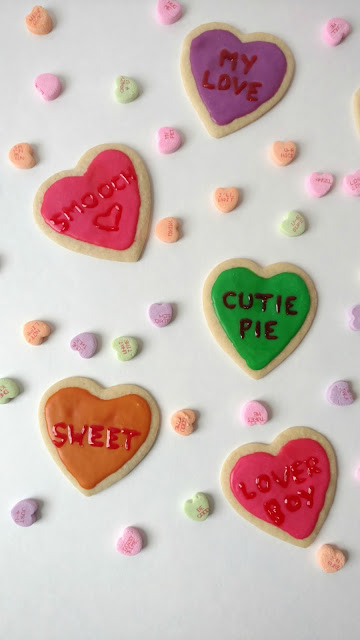
Okay, so these cookies might be one of the funnest (most fun?) treats that I make. Most of the time I make a bunch and let the kids help decorate. But with these conversation heart cookies, I keep most of them for myself and let the kids help with only a dozen or so.
To make your own conversation heart cookies, you'll need:
- one batch (about 3 dozen) roll and cut cookies (recipe HERE)
- one batch of frosting (recipe HERE)
- food coloring (I used Neon)
- bowls
- red decorating gel
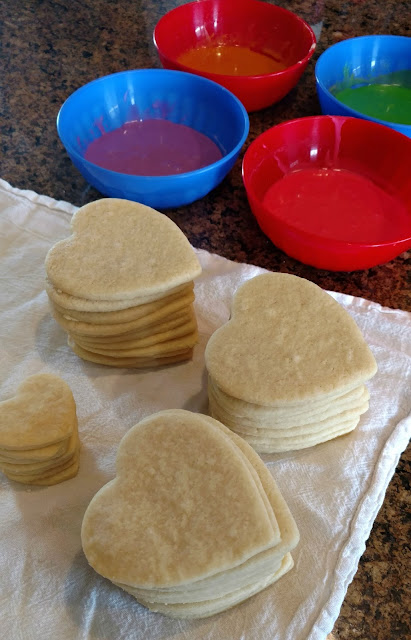
Before you start decorating, make sure the cookies are completely cool. Make the frosting and divide it into bowls, depending on how many colors you want. I chose to do four colors.
Using the back of a small spoon, spread the frosting around the cookie, leaving a small border all the way around. (See my cookie recipe for more in-depth instructions on using this frosting.)
The next step is important because if you don't do it, you won't be able to write the words on the cookies. You have to let the frosting/icing completely dry. This can take a few hours during the day but I usually just frost them at night, leave them out for a couple hours and then store them in an airtight container until I'm ready to do the next step.
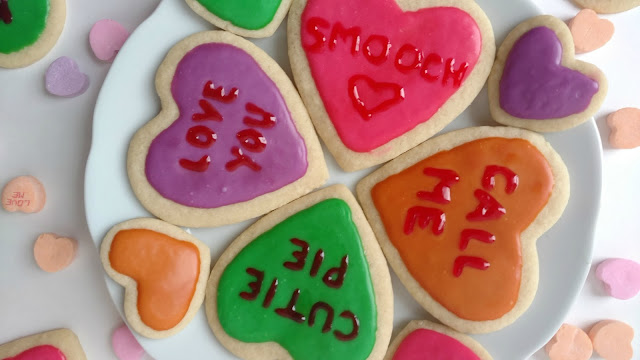
To write the words on the cookies, I use a small tube of red decorating gel. Just snip off the top and squeeze a little out to get a feel for how hard you need to push. Keep a napkin or paper towel nearby to wipe the tip of the tube off to keep it clean between cookies.
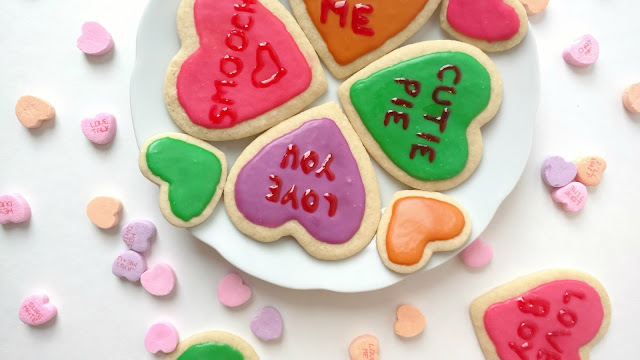
Unless your cookies are really big, you'll want to stick to one or two words or shorten the words to single letters (example: You are = U R). I like to use the top middle part of the cookie where it dips down as my center when I am deciding where to place my words. For example, when I write the word "sweet", I write the first "e" in the middle and use that as my center, writing the second "e" and "t", then going back and writing the "w" and the "s" last. Doing it this way just keeps things more centered. (Although let's be honest, the words on the real candies are anything but centered.) If you mess up a little, you can just use your (clean and dry) finger to wipe it off the cookie and start over. This is one of the biggest reasons why you want to make sure the icing is dry. It's much more forgiving if you make a mistake. In the example below you can see that I wrote "kiss" then used that word to help me center the word "me" underneath it.
If you're going to be storing them, I highly recommend letting the gel set and thicken before moving them to a container. Store them with a sheet of wax paper in between and keep them in the fridge or on the counter for up to one week.
So what do you think? Are you excited to make your own? I seriously just love making these at Valentines even though they do take a little longer due to the time between steps. But when they're finished and you give them to your kids, spouse, neighbors or friends, the look on their face will make it worth it and they will think U R CUTE. *wink* (I couldn't help myself.)
If you are looking for more Valentines ideas, check out The ULTIMATE All Things Valentines Round Up I put together a couple weeks ago. You'll find ideas for crafts, kid activities, recipes, date night and gift ideas and more! I'm not kidding when I say there is literally something for everyone.
Do you have a favorite Valentines treat you make every year or a favorite candy you can only find during Valentines? Share below, I'd love to hear!






Oh my word! These are adorable. What a precious idea for Valentine's Day!
ReplyDeleteYou have impeccable timing! Was planning to make some fun Valentine's goodies to send to our families this weekend and I was just about to go searching for a sweet treat. These are PERFECT and my boys will love helping to make them. So excited!
ReplyDeleteI'm so glad I could help Sara! I hope you all have a blast making them together.
DeleteI remember these when I was younger!!! I loved getting them. I need to make my own now that you shared this recipe!
ReplyDeleteThe cookies are definitely better tasting than the candy, haha! I hope you have fun making them.
DeleteI totally sorted through the hearts to pick out ones for certain people too! LOL. And these cookies are adorable, why haven't I ever thought of this?
ReplyDeleteYes! A kindred spirit! ;) These cookies are seriously so fun to make.
DeleteHow adorable is this! I love how you can put anything you want on the cookies. <3 <3
ReplyDeleteLove,
Ivelisse | CarnationDreams.com
Thanks Ivelisse! I think part of the fun is personalizing the cookies to say what you want.
DeleteThese are so cute! I love sugar cookies, but never thought to make my own. I'll definitely have to try this recipe.
ReplyDeleteThanks Emily! Keep in mind that these cookies are a little different than regular sugar cookies, but still just as tasty!
DeleteWhat cute cookies! Definitely perfect for a sweet Vday treat :)
ReplyDeleteThanks Tabitha! My thoughts exactly. ;)
DeleteThese are adorable! I want to make them soon!
ReplyDeleteThank you Allison! They are a lot of fun.
DeleteHow adorable! These look just like the little candies. I'm sure the cookies taste much better, though! Nice job!
ReplyDeleteThank you Patricia! That's what I was going for so I'm glad you think so too!
DeleteOMG! These cookies are so stinkin' cute!!!! Such a great Valentine's Day treat!
ReplyDeleteThanks Samantha! I think so too.
DeleteI'm a sucker for anything heart-shaped during Valentines! These cookies are made with such care and love - anyone who receives them will surely feel it ^_^
ReplyDeleteThank you for such a sweet comment!
DeleteThese look delicious! Great post!
ReplyDeleteXOXO
Your Redlocks and Shamrocks Girl,
Lisa Doyle
www.redlocksandshamrocks.com
Thanks Lisa!
DeleteSuch a fun idea, and easily customizable for each one.
ReplyDeleteSo true Tamara!
DeleteAhh I LOVE them!! I loved those as a child, too. You did always want to get the "love ya" one from your boy crush. Such a cute idea!
ReplyDeleteYeah, those candies are too sweet for me now, but I loved them as a kid. Sometimes I make silly ones and give them to my husband, haha.
DeleteSo, so, so cute! Pinning & sharing!
ReplyDeleteAw, thank you Lora!
DeleteThese are adorable and look delicious!
ReplyDeleteThank you so much Jessica! They are super yummy. ;)
DeleteOh my, these are so cute!! Yum!
ReplyDeleteThanks Vanessa!
Delete