This post contains affiliate links which means if you click on a link and make a purchase, I will receive a small commission at no additional cost to you. Thank you for your support!
So when I found an unused Amazon gift card, I knew what I wanted to purchased: a Silhouette heat transfer vinyl starter kit. I bought it and waited excitedly for it to come in the mail. In anticipation of the soon-to-be delivered vinyl, I stopped by Target and picked up a few basic v-neck t-shirts (you can never have too many of those!).
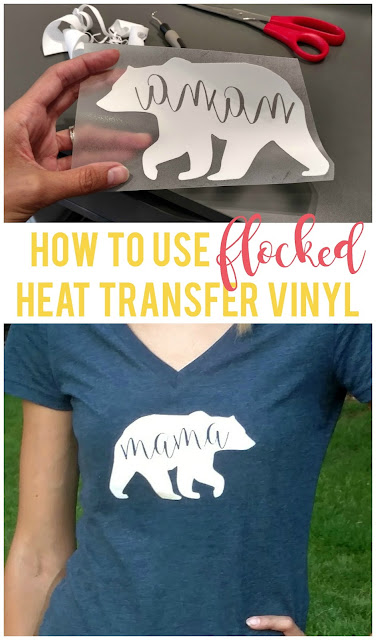
As far as what I wanted to put on the t-shirts, I had a few ideas based on shirts I'd seen in stores or online. I pulled up my Silhouette studio software and started designing. The design I settled on was a bear silhouette with the word 'mama' on the inside. Pretty simple.
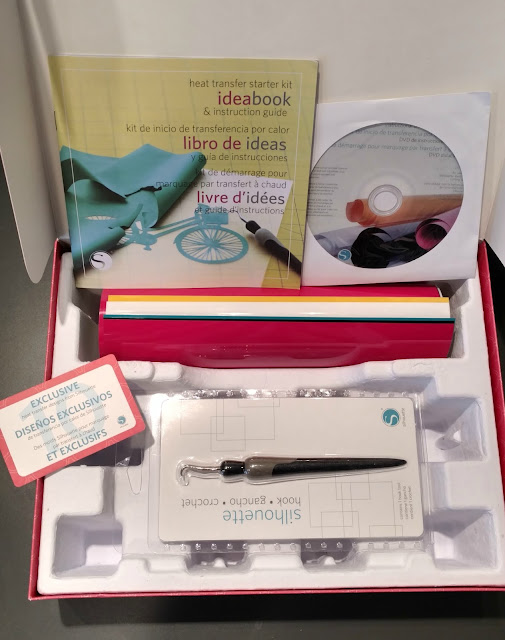
When I got the kit, I opened it up and found 2 sheets of flocked heat transfer vinyl (white and yellow), 3 sheets of smooth heat transfer vinyl (black, hot pink and turquoise), a weeding tool, a small instruction book, a instructional DVD and a card with a code to download 10 free designs from the Silhouette store.
Before starting, I looked up a couple of YouTube videos to make sure I understood what I needed to do, since the print instructions that came with the kit weren't too detailed. (I'll be honest, I haven't looked at the DVD but I decided it would be faster to just look up a few videos online.)
For the rest of this tutorial, I'll show you what I did and tell you what I learned so you will feel more confident and hopefully avoid any of the mistakes or set-backs I had.
Flocked Heat Transfer Vinyl
What is flocked heat transfer vinyl?
Flocked refers to the texture, which is a little bit fuzzy and soft. It is thicker than regular heat transfer vinyl.
I chose to do the bear design on a dark blue heathered shirt with the white flocked heat transfer vinyl (which I will refer to from here on out as HTV).
To create the design, I just searched online for a bear silhouette that I liked the shape of, then saved it to my computer. Next, I opened up my Silhouette studio software and started a new project. Then, I dragged the bear silhouette into my software and traced it and deleted the original picture from my page.
Next, I typed the word 'mama' all in lowercase, then searched through my fonts for one that I liked. I knew I wanted to use a cursive or script font and ultimately decided on one called Magnolia Sky (free download HERE). I pulled the word up inside the bear silhouette and rotated it and sized it until I liked how it looked. (For a tutorial on how to download and install fonts, click HERE.)
Then, I pulled out my shirt and laid it out flat on the ground and used a ruler to get a basic estimate of the available space. (The sheets of HTV were only 9x12 so any one image couldn't be bigger than that.) I decided on a size I thought would look good on the shirt and then selected both the bear and the text and resized it to fit on the shirt.
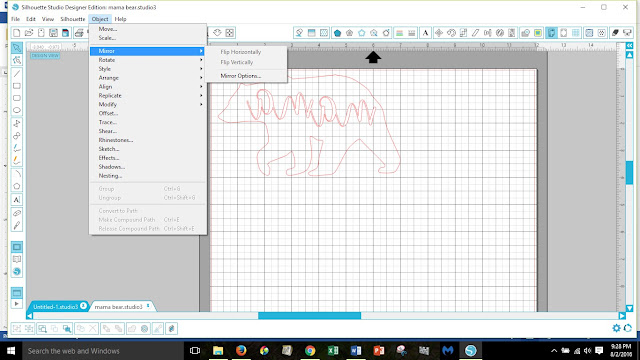
*TIP* If you are making a design with text, you will need to make sure that you flip the entire image (either horizontally or vertically depending on your design). This is an important step because when you cut the vinyl, you are cutting on the BACK, hence the reason why you'd want to make sure your image is flipped. Otherwise, you'll end up with backwards text. You can flip your image by selecting all the pieces that need to be flipped, clicking 'Object' in the tool bar, scrolling down to 'Mirror' and then choosing either 'Flip Horizontal' or 'Flip Vertical'.
I flipped my images horizontally and then adjusted it to be closer to the edge of the cut area so I wasted the least amount of vinyl possible.
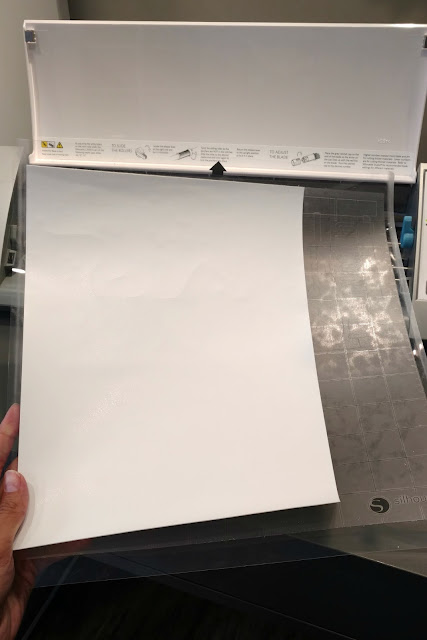
Next, I placed the HTV shiny side down on my cutting mat and loaded it into the machine.
*TIP* Some of the tutorials I saw said you could load the vinyl directly into the machine, but I didn't do this because I didn't want to run the risk that it would slip while being cut, so I place my HTV on a cutting mat before loading it into the machine.
Before I cut anything on my Silhouette, I always check the cut settings to see what I need to set my blade to.
*TIP* For flocked HTV, you have to move your blade to at least a 3, possibly a 4, depending on how new/old your blade is.
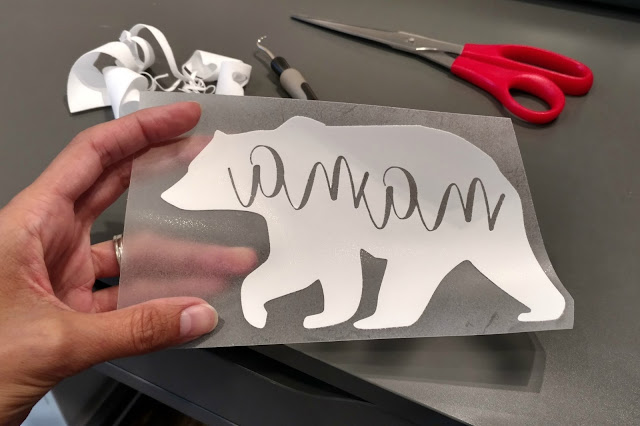
I sent it to the Silhouette to be cut and then watched the magic happen. :) I unloaded the cutting mat and then removed the portion of HTV outside the bear and the word 'mama'. I used this nifty little weeding tool that I got with my kit to grab onto the lettering and pull it out. (Something to note is that neither the vinyl nor the backing is sticky, so it differs from regular adhesive vinyl in this way.)
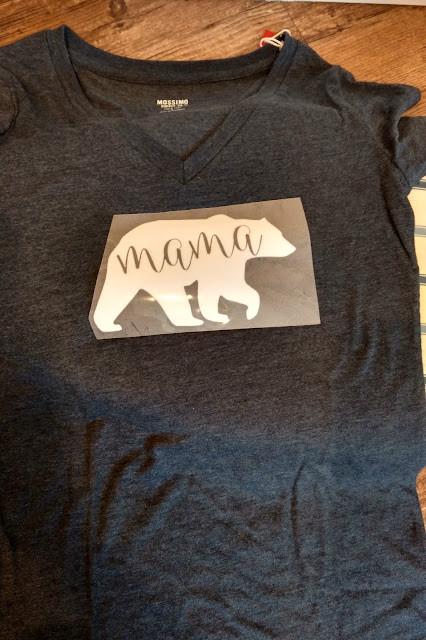
I turned on my iron to the hottest setting and let it heat up while I laid my shirt out on top of the ironing board and placed the HTV where I wanted it, making sure the shiny side is up.
*TIP* Do not iron directly onto the plastic backing. It will melt onto your iron. Use some cotton fabric doubled-up or one of these heat transfer cover sheets.
When my iron was hot, I double-checked the placement on my shirt and placed the iron over the top of the design. The instructions I found said to press firmly for 45-60 seconds. I just counted in my head and checked it after 45 seconds, then moved my iron over to cover more of the design, counted another 45 seconds and so on, until I felt I had ironed everywhere.
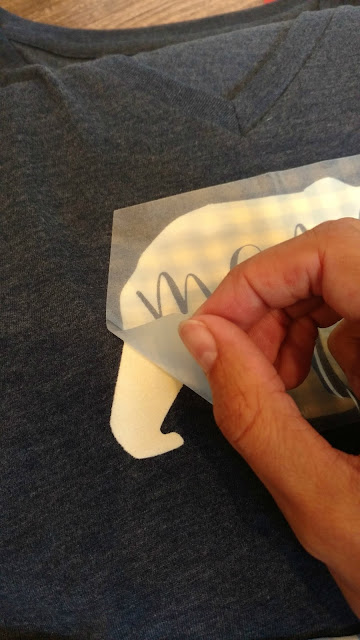
I removed the cotton fabric I'd used and gently pulled on the plastic to see how well the vinyl would come away from it.
*TIP* There will be a little bit of resistance, but the edges of your design should stay on the surface you've ironed it to if you've done it correctly. If not, just replace the cotton or cover sheet and press the iron in the spots(s) that need a little more heat.
When I pulled the plastic backing off, I was a little disappointed to see that my vinyl appeared to have discolored a bit because it was a little bit tan instead of the white that it should have been. Although I don't know for sure, I'm guessing I either left my iron on the vinyl for too long, or the heat was on too high of a setting. When I showed it to my sister, she didn't even notice the discoloration and said she thought it was just part of the design. So I guess you and I will be the only ones who know. *wink*
*TIP* When in doubt, start with less time pressing the iron to the vinyl rather than more.
All in all, I'm happy with how my first HTV project came out. I haven't had any problems with the vinyl lifting at the edges and it cut really well. My only two complaints about the flocked HTV are 1) the chance that there could be discoloration if you leave the heat on it for too long and 2) the fuzzies that get stuck to the design.
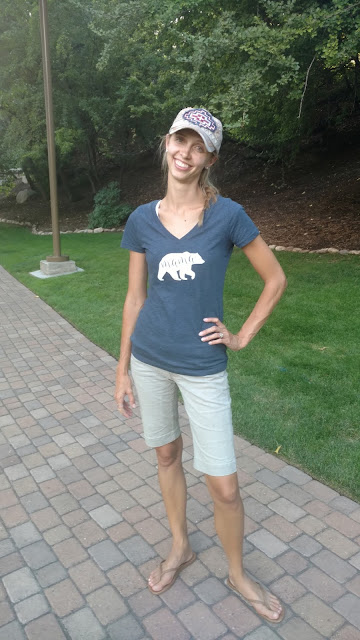
p.s. Don't judge my non-model pose. I'm not a fashion blogger and my husband is not a photographer. *wink*
p.p.s. You can however tell me how darn cute my kids are. No wonder I'm a mama bear when it comes to them!
p.p.p.s. Keep an eye out for my tutorial on using smooth heat transfer vinyl!
I hope you've found some helpful hints for using flocked HTV!






This is so cool!! I totally want to make your shirt and feel like I can with your tutorial.
ReplyDeleteThank you Lindsay! I'm glad you found it helpful. :)
DeleteIt's so cute!!!!!! You could sell that shirt and I'd totally buy it. ;-)
ReplyDeleteThank you! I always feel a little extra cool when I wear it because I think it looks like it could have come from a store, but I totally made it! Of course, I'm the only one who knows that...
DeleteI love the end result, thanks for sharing how you did it-great tutorial!
ReplyDeleteI have a machine that cuts, but I've been so scared to try the vinyl. I don't know why! Your cute shirt had inspired me.
ReplyDeleteI'm always nervous before I try cutting a new medium on my Silhouette machine, so I try to do a test cut or something so I can make any adjustments I need to before cutting the real design out. Good luck and let me know if you need any help (or cheerleading!). :)
DeleteYour design looks great! I didn't notice the shading of the bear in the photos of you wearing the t shirt.
ReplyDeleteThank you Beth! I think I notice it more because I'm the one who made it but no one else has really noticed unless I point it out. ;)
DeleteMOMMA BEAR! Oh I could not love this more!! Seriously this T looks like one I would totally overpay at a boutique! Love that I can make this on my own with your tutorial!
ReplyDeleteThank you! I really do love this shirt. I think every mom should have one because we've all got a little 'mama bear' in us. ;)
DeleteNo judgment at all. This shirt came out great.Thanks for sharing. I might need to make a blog shirt with my design. And yes your kids are adorable.
ReplyDeleteAw, thank you! That would be a great idea to make a shirt with your design. You'd be a walking advertisement. :)
DeleteFirst of all, your kiddos are the cutest!! I love this idea!! Youncan't even see the discoloring on the bear when you're wearing the shirt. I'll add that to my list of craft supplies to buy .... (don't tell my husband!!) :)
ReplyDeleteAw, thank you Sarah! They are pretty cute, but I'm definitely biased. ;) I'm so glad you can't see the discoloration. I was really worried about it at first, but most people say the same thing as you which makes me feel better. As for telling your husband, your secret is safe with me! ;)
DeleteSuch a cool project - and you are rocking that shirt!! I don't have one of those kits but how nice that you can create your own designs rather than purchasing them for a heft price.
ReplyDeleteThank you Zan! I love having a cutting machine because I use it all. the. time. I've seen this same type of shirt at the store for $20+, but I made it for about $9. Definitely a savings in my book!
DeleteThis is really cool and a great, detailed tutorial! I hadn't seen the flocked vinyl, but I like that option. I've got an old Cricut that doesn't tie into the computer. If it did, I would have SO MUCH FUN making stuff like this. Jealous :)
ReplyDeleteThank you so much Lora! :) I had a Cricut machine before I got my Silhouette and I have to say that I'm totally in love with it. The fact that I can connect it to the computer makes creating so much easier, plus I'm not limited to cutting only what is on a cartridge. Definitely worth looking into if you like cutting fun patterns and designs out. :)
DeleteWow what a great step by step tutorial ❤ I love flocked vinyl - The feel and the look make it special. Do you think using a heat press would have prevented the discoloration?
ReplyDeleteI find that I have to put the temp just under the cotton setting and I use a pillowcase between the vinyl and the iron.
ReplyDeleteI do not have a machine yet to do the cutting for me :( I still use my exacto knife and hand drawn designs... BUT Christmas is coming!
DeleteSuch a fun project! Thanks for the tips! I may have to try this in the near future.
ReplyDeletegreat project! thanks for sharing I am new to heat transfer vinyl this is really helpful.
ReplyDelete