I'm not even joking when I say this post and project has been on my mind for the last month. If you've been following along the last few months, you'll know that today is the second Wednesday of the month, which means that it is also the Inspire My Creativity link up. Each month, myself and 12 other bloggers post projects prompted by the same theme. We choose the themes by voting and this month, the theme is EMBROIDERY HOOPS.
To be honest, I've never really considered using embroidery hoops for anything besides what they were created for. I've even got a few on hand for when I work on embroidery. So the first thing I did to try and get ideas was hop on Pinterest. There are so many creative ideas that I was kind of overwhelmed. But none of them struck me as projects that were my style. I did notice that all the projects I saw used circular embroidery hoops, which got me thinking: do they make oval ones? After a quick search, I found some on a cute Etsy shop called Crafty Wool Felt. An idea had started brewing in my mind about how I could use oval hoops to make pumpkins.
Here's what I got for my project:
- (1) 8"x12"embroidery hoop
- (1) 5"x9" embroidery hoop
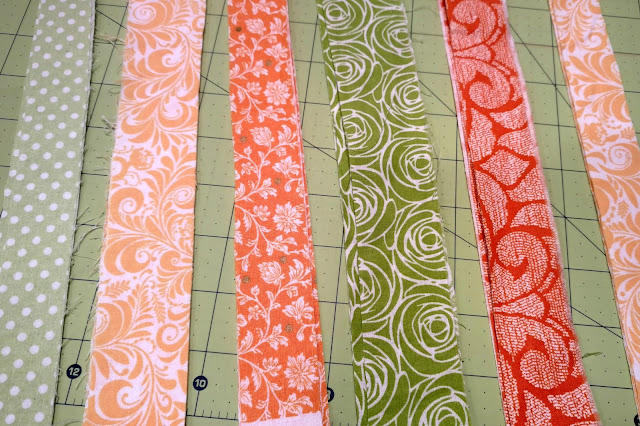
- 1/8 yard of (5) coordinating fabrics
- 1/4 yard of white felt
- (2) yards of coordinating pom pom trim
- cutting mat
- rotary cutter
- scissors
- sewing machine
- iron
- ironing board
- brown acrylic paint
- 1/4" wooden dowel
- raffia
- foam brush
- glue gun
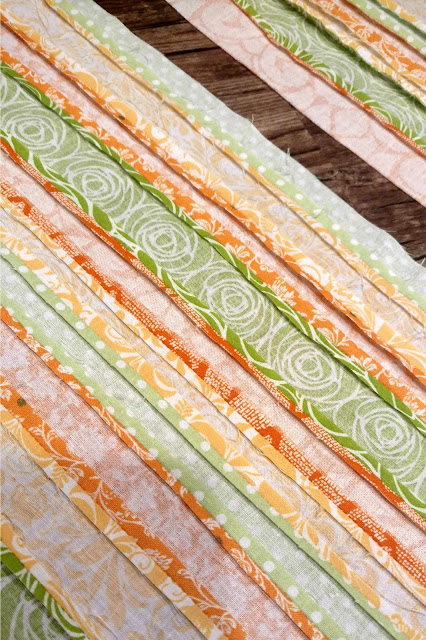
First, I cut the fabric into strips varying in widths between 1" and 1 1/2". Then I cut them into 14" strips. I sewed the pieces together in a random pattern, using a 1/4" seam allowance until the piece was wide enough to fit the frame. (For the larger frame, this was about 14"x9" and the smaller was about 14"x 6".)
Next, I turned my iron onto the highest (cotton) setting. Then I pressed the seams of each pieces so they would lay flat. (You can see in the upper right hand corner of the picture what it looks like without the seams pressed.)
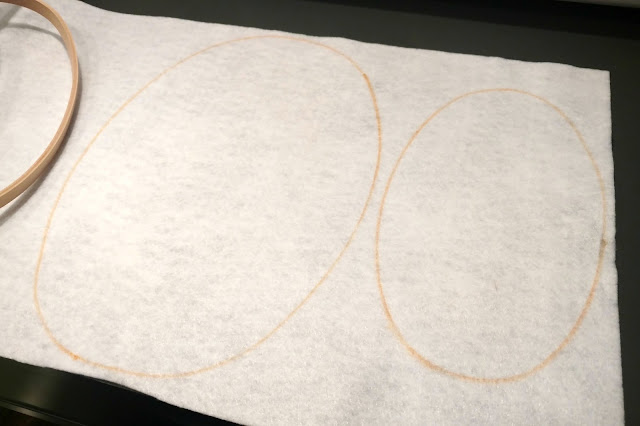
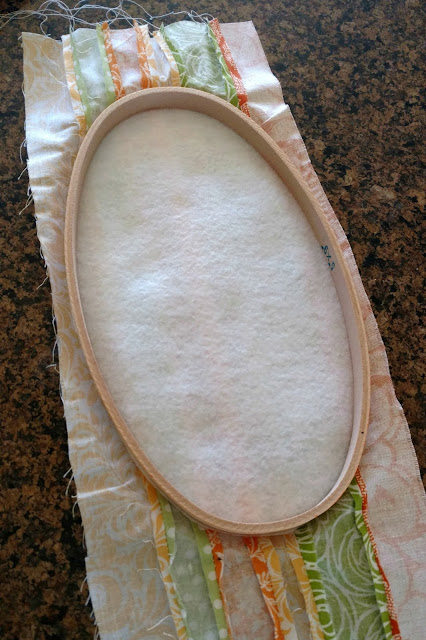
Then, I traced the outer edge of each hoop onto the white felt and cut it out. I unscrewed the embroidery hoops and pulled out the inner hoop. I laid the felt on top of the ironed pieces of fabric, then flipped it over and placed it on top of the inner hoop. (You could forego the felt, but I wanted to make sure that the fabric had a more opaque look to it which is why I layered the felt behind it.)
After that, I put the outer hoop over the top and pushed down to tighten the fabric over the hoop. I tightened the screw about 1/2 way and made sure that the felt and fabric were still underneath the hoop and hadn't popped out. Then I tightened it as much as I could to make sure it didn't move.
Next, I cut the excess fabric off around the edges of the frame.
For the trim, I used a full yard of trim for the large hoop and about 3/4 yard for the smaller hoop. To attach it, I used a hot glue gun. I put about 3 inches of glue along the edge and then placed the trim on top of it, continuing around the edge until I reached the end of the hoop.
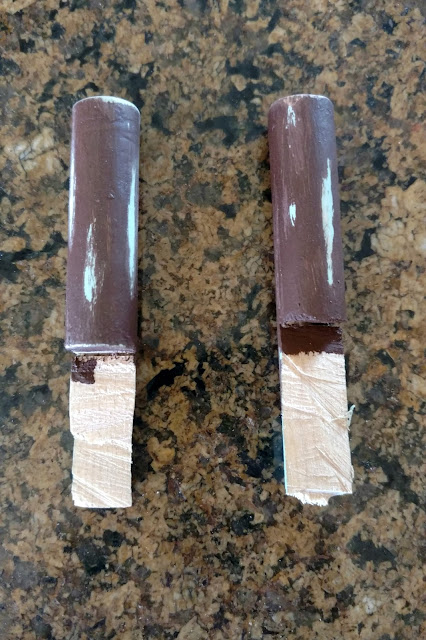
To make the stem, I cut the dowel about 3 1/2" long and cut a notch in it so it would fit more snugly along the back and top. Then I painted them brown, distressed them a little and glued them on. I wanted one pumpkin vertical and the other horizontal so I made sure to glue the stems on accordingly.
Lastly, I got some raffia and tied it around the stem and trimmed the ends.
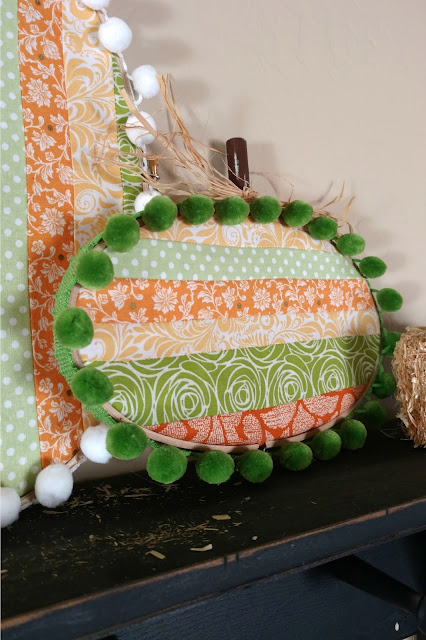
And that's it! I love the scrappy look of the pumpkins and the pom pom trim really does finish it off perfectly, don't you think?
As I mentioned above, this post is part of the Inspire My Creativity link party where every second Wednesday of the month, I will be co-hosting along with 12 other talented bloggers where we will be sharing a project based around a theme. You can check out each of their blogs below:
Shani | Sunshine & Munchkins
Anna | Practical and Pretty
Ali | Home Crafts by Ali
Cathy | A Boy and His Mom
Emy | Semigloss Design
Missy | Gypsy Magpie
Christine | Swordfights & Starry Nights
Meg | The Kusi Life
Kim | Creigh-ations
Candice | She's Crafty
Lauren | A Life of Love and Joy
Sarah | Making Joy & Pretty Things
This month our theme is embroidery hoops.
I'd love if you took a minute to look through and see what each of the
hosts are sharing this month. Feel free to add your own embroidery hoop projects to the link up and use the hashtag #InspireMyCreativity on social media!
Also, join us next month for our link party on the second Wednesday of the month.
Our theme is DIY GIFTS and I'm excited to
see what each of the hosts (and you) come up with! We'd love
to have you join us on Wednesday, November 8!






I love these!! They are so fun and festive, but still really unique!
ReplyDeleteI had no idea they made oval hoops. Such a cute project!!
ReplyDeleteThey look so cute! I would love to have those for my home. I didn't know that there were oval hoops either, I'll have to get a few to add to my craft stash.
ReplyDeleteI just think that every craft project should involve pom poms, and this one is such a cute idea! What an adorable DIY decor idea for fall. So original!
ReplyDelete- Maryal
www.LoveandSpecs.com
I am gonna try this, I love the colors and the Pom definitely make it looks so pretty.
ReplyDeleteIts amazing what you can do with an embroidery hoop. They look so pretty.
ReplyDeleteThese are so cute!! Perfect for Fall decorating
ReplyDeleteThese are darling! I love how they turned out! So fun to see the oval hoops too- I love how they look.
ReplyDeleteI really like these. I have been looking for fun DIY project for Fall, especially pumpkins because carving this year has not been the best. These are so pretty too, and look very easy!
ReplyDeleteThese are so cute! I love your fabric combination!
ReplyDeleteI love the pattern you did! This is such a fun project ��
ReplyDeleteOh my goodness, these turned out so, so cute! And I love the pom poms, they're a great addition!
ReplyDeleteLove this project! And those pompoms are just too cute on the pumpkins!
ReplyDeleteI love projects that can be used for Halloween and Thanksgiving!
ReplyDeleteYou are seriously so creative Shani! What a fun idea for a Halloween craft project!
ReplyDeleteI'm a sucker for pom pom trim. Very cute!
ReplyDeleteHow cute are these! What a great idea!!
ReplyDeletei was just browsing along and came upon your blog. just wanted to say good blog and this article really helped me. https://www.custompatchmaker.com/
ReplyDelete