

This post contains affiliate links which means if you click on a link and make a purchase, I will receive a small commission at not additional cost to you. Thank you for your support!
For Halloween this year, my kids wanted to dress up as Owlette and Cat Boy from the show PJ Masks. When I looked around for costumes online they were a little more than I wanted to spend so I found some alternatives. For Owlette, I got this hooded t-shirt that my daughter can wear even after Halloween is over. For Cat Boy, I found a Cat Boy and Gekko pajama set that my son can wear this winter as actual pajamas. I love finding costume solutions that can double as both costume and clothes! I was hoping that the masks wouldn't be overly expensive, but looking around I couldn't find any I liked for less than $12 a piece. No thank you. My solution: felt and a little online inspiration.
Here's what you'll need to make the masks:
- felt sheets (dark and light pink for Owlette, dark and light blue for Cat Boy)
- thick foam sheets (white or coordinating color of dark pink or dark blue)
- scissors
- fabric glue
- pencil
- sharpie (I like the twin tip kind)
- flat 1/4" braided elastic
- hole punch or Crop-a-Dile (one of my most used craft tools)
- printed pattern for Owlette and/or Cat Boy, OR your own pattern
First, start by printing off the pattern. I'll be completely honest, I freehanded both of these patterns and based them off of some images I found online. I'm going to say they would fit ages 2-5. I'm going off of my own kids, ages 5.5 and 3.5, and the size of their face. They were actually asleep when I made these so I didn't get to measure them before I started cutting the felt and foam out. The eye holes are a touch close together for my daughter and I would have widened them a bit if I'd known. So if your child's eyes are further apart, you may want to print out a copy of the pattern, cut it out and place it on their face before you start cutting everything else out and make adjustments if needed.


Phew! Now that you've got your pattern printed out (or hand drawn), you can continue in one of two ways:
- A) Trace over the top of the pattern onto your foam sheet, using a blunt end,such as a mechanical pencil with the lead pushed in, pushing hard enough to dent the foam through the paper so you can cut it out, OR
- B) Cut out the mask around the outside edge and the eye holes only and trace it onto the foam sheet.


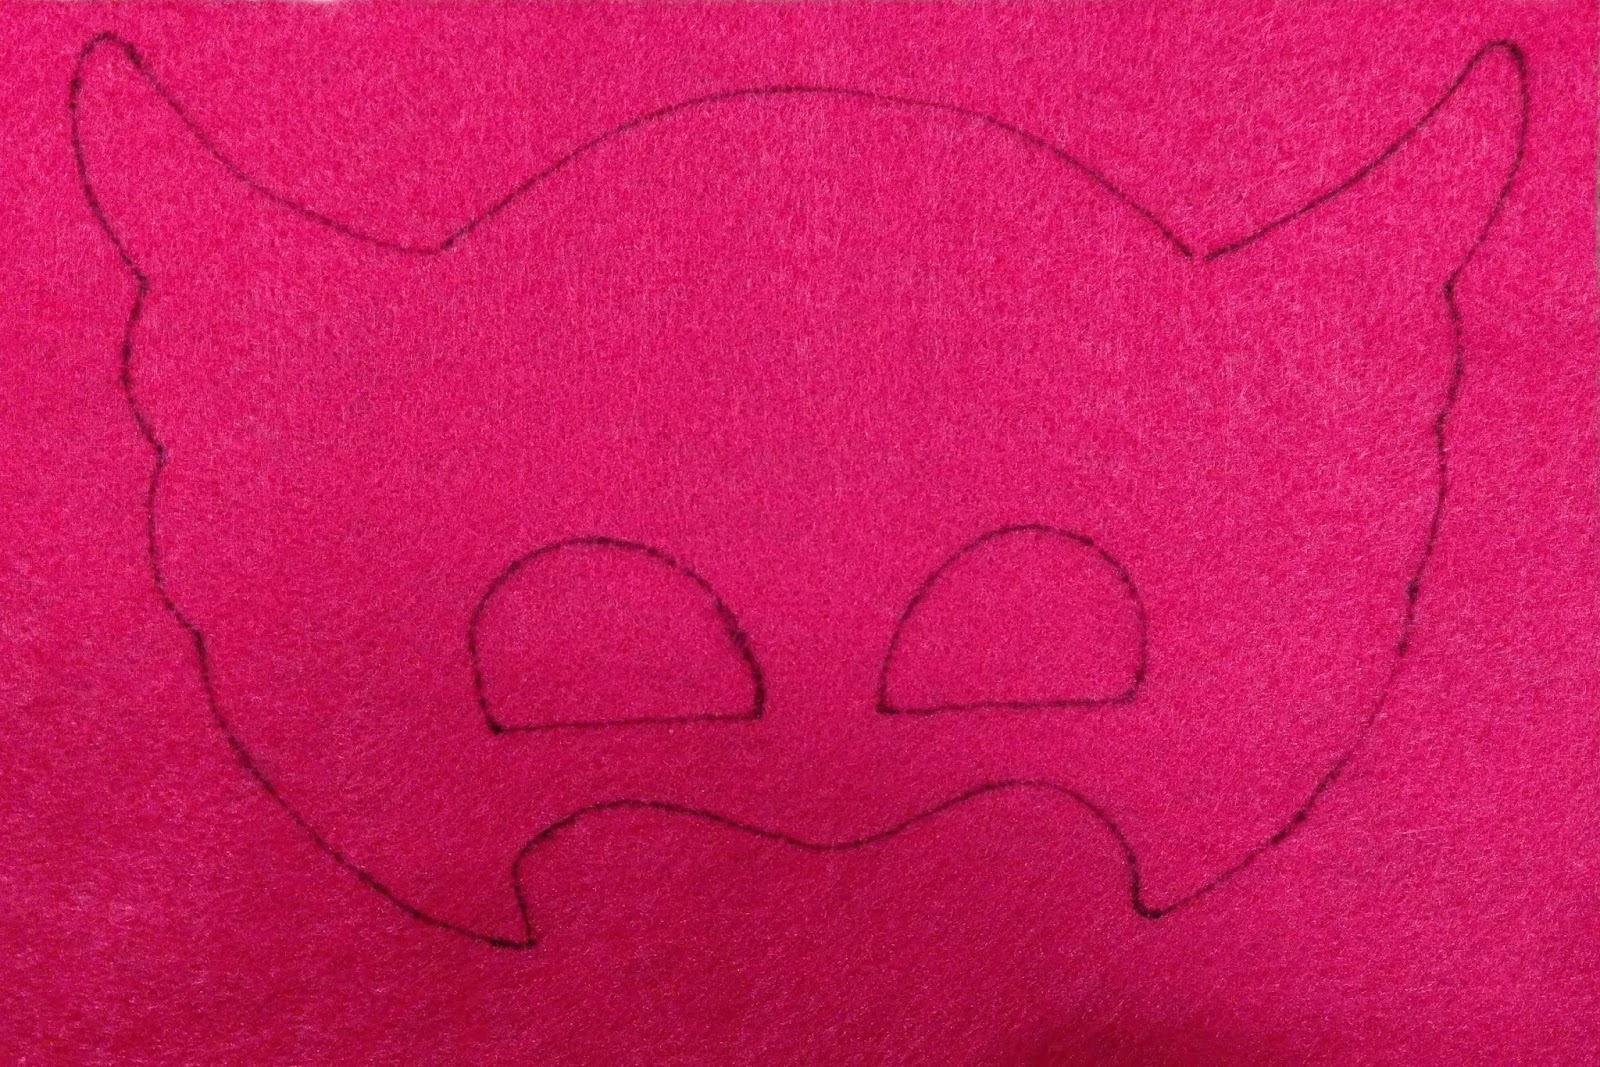
Once the outline is traced, cut it out. Using the foam as a template, trace the mask onto the darker colored felt. *Note: The foam is important because it does two things: provides structure for the mask and it's softer than felt on your child's face.
*TIP* The masks are symmetrical, so I'd recommend tracing lightly with a sharpie on one side and then flipping it over so you can't see the marker on the front of the mask. Same thing goes for the smaller elements of the mask when you trace them onto the lighter colored felt.

Next, you need to cut out the smaller pieces of the mask that will be traced onto the lighter colored felt.
- For Owlette, you only need to cut out the v-shaped piece at the top.
- For Cat Boy, you need to cut out one set of stripes, one eyebrow, one triangle piece (inside the ear), the center arrowhead shape and one lightening shape.


Trace and cut out the v-shaped piece onto the light pink felt. Glue it on using the fabric glue. While it dries, draw the eyelashes above the eyes and the small swoops on either side of the mask (as shown below) using a sharpie. Place a line of glue around the outer edge of the foam mask pattern and around the eyes. Let dry. Punch a hole on either side of the mask. Thread the elastic through on one side, tie it off and measure your child's head to get the correct length of elastic. Thread it through the other hole and tie it off. Trim any extra elastic.

Cat Boy
Trace and cut out one set of stripes, one eyebrow, one triangle piece (inside the ear), the center arrowhead shape and one lightening shape. You will need to make sure you trace everything but the arrowhead shape two times onto your light blue felt. Glue the pieces on as shown on the original pattern. Place a line of glue around the outer edge of the foam mask pattern and around the eyes. Let dry. Punch a hole on either side of the mask. Thread the elastic through on one side, tie it off and measure your child's head to get the correct length of elastic. Thread it through the other hole and tie it off. Trim any extra elastic.

My kids loved the masks when I was done! They were especially happy that the mask wasn't itchy due to the foam backing, which made them a lot more likely to keep it on.


Happy crafting! And if you have any questions, please don't hesitate to comment or email me directly at sunshineandmunchkins (at) gmail (dot) com.


How fun and cute!! LOVE PJ MASKSS!! https://mylogicalliving.com
ReplyDeleteI'd never heard of the PJ masks before. My first thought when reading the lyric from the theme song was how many kids try to use that to stay up later at night haha :) But these costumes are super cute, and your kids clearly love them! I love that their handmade too!
ReplyDeleteI need to make these ASAP! My daughter would just be over the moon!
ReplyDeleteThese masks are so amazing friend, I can't believe how great they turned out! My kids have seen them and they're obsessed so I guess I'll be making some, lol.
ReplyDeleteMy son loves Cat Boy! This is perfect!
ReplyDeleteSuch a good idea, these are SO cute!!! Can’t wait to start making fun things like this once my baby boy arrives!!!
ReplyDeleteI saw these in your insta stories! They turned out so well! And bonus that the kids get to wear PJs instead of fussy costumes!
ReplyDeleteThese are absolutely the cutest!! My kids love this cartoon so we will definitely need to make!
ReplyDeleteThese are darling! Such fun masks to go with such a well-loved cartoon. Such a great idea!
ReplyDeleteMy kids love this show! I'll have to show them your awesome masks :)
ReplyDeleteThese turned out so cute!! I think I may be making one for my 5 year old soon.
ReplyDelete