This post contains affiliate links which means if you click on a link and make a purchase, I will receive a small commission at no additional cost to you. Thank you for your support!
To make a bikini onesie, you'll need the following materials:
- white onesie (I used a 0-3 month size)
- fusible web
- fabric of your choice
- iron
- pencil
- paper
- scissors
- ruler
- coordinating button and thread (optional)
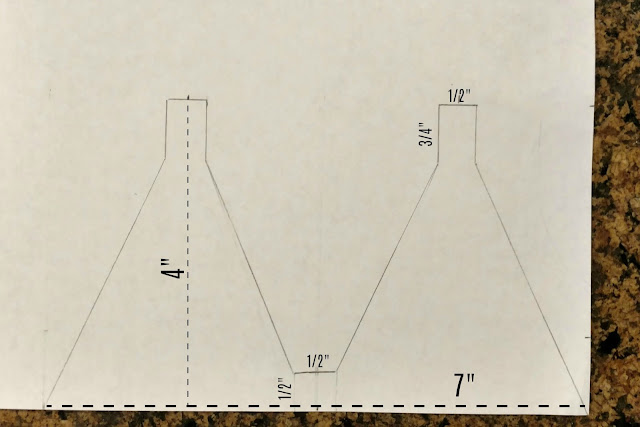
Start by laying the onesie out flat. Using the ruler, measure the width of the onesie. I'll give the measurements for the one that I did but if your onesie is bigger or smaller than mine, you'll have to make adjustments. Mine was about 7 inches across. Then measure from the top of the buttons at the bottom to figure out how high you want the top of the bikini bottoms to be. Mine was 4 inches.
Next, grab a piece of paper, pencil and ruler. Measure a rectangle that is the same width and height of the measurements you took for the onesie. Again, mine was 7x4 inches. Measure down 1" from the top of the rectangle on either side and make a mark. At the bottom of the rectangle, measure the halfway point and mark it. Mine was 3.5". Then make a mark 1/2" on either side of the middle mark. Cut out the rectangle and place it on top of the onesie.
Using a cereal bowl turned upside down, trace an arc from the bottom of the 1" mark on the top right to the right side of the 1/2" mark you made at the bottom. Cut it out, fold the rectangle in half and then trace the arc on the other side of the paper and cut it out as well. You are left with the shape of a bikini bottom.
To make the bikini top, make the same size rectangle as you did for the bottom. Measure the halfway mark at the top and bottom of the rectangle and draw a line. At the bottom of the rectangle, measure 1/4" on either side (for a total of 1/2") and 1/2" up on both sides. At the top of the rectangle, measure the halfway point of each smaller rectangle. (It came out to be 1 3/4" for me.) Draw a line 1/2" across and 3/4" down on each side. This makes the little "straps". Now, draw a straight line from the right side of the "strap" to the bottom right side of the rectangle. Next, draw a line from the left line on the right strap to the top of the 1/2" line you made at the bottom middle. Repeat on the left side. Cut out the bikini top.
Next, heat up your iron. While the iron is heating up, get your fusible web and trace the bikini top and bottom on the smooth side. Grab your fabric and cut out a rectangle shape that is about the same size as the fusible web piece you traced your bikini onto. Turn the fabric over so the wrong side (the back side) is facing up. Place the fusible web rough side down on top of the wrong side of the fabric. Follow the instructions on the packaging to know how long to hold the iron in place on the fusible web. Mine said about 3-5 seconds. Let it cool completely. (Keep your iron on since you'll need it again after the next step.)
Once the fabric is cool, cut it out so you have your top and bottom. Peel off the paper backing. The fabric should feel smooth on the backside where you ironed the fusible web to it.
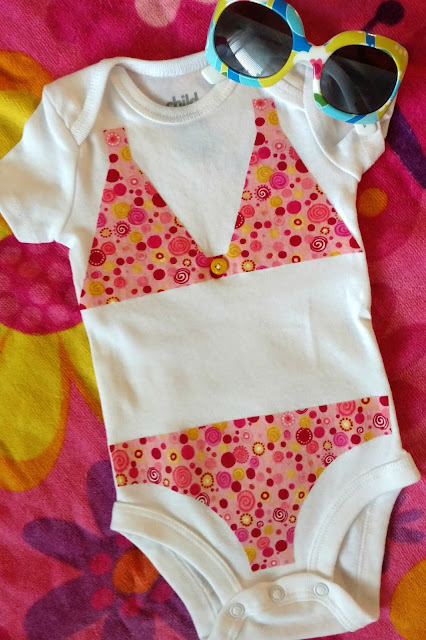
Lay your bikini pieces on the onesie where you want them to be ironed. Get a rag and put some water on it, then squeeze it out so it is slightly damp. Lay the damp rag on top of either the top or bottom bikini piece and press your iron on top for about 10 seconds, or until the rag is dry. Repeat this until you've ironed on top of the entire bikini bottom. Repeat this process for the bikini top. Let the fabric cool and dry. If you want, get a small button in a coordinating color and sew it onto the middle part of the bikini top.
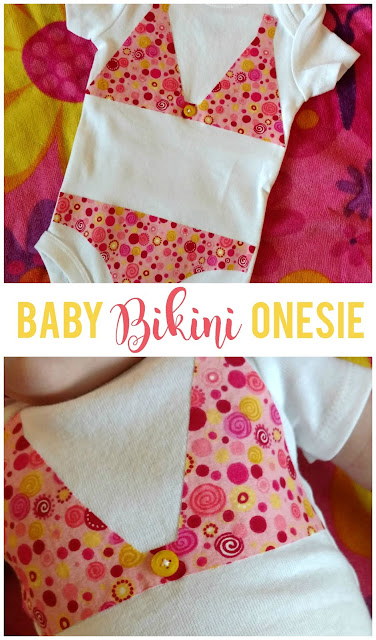
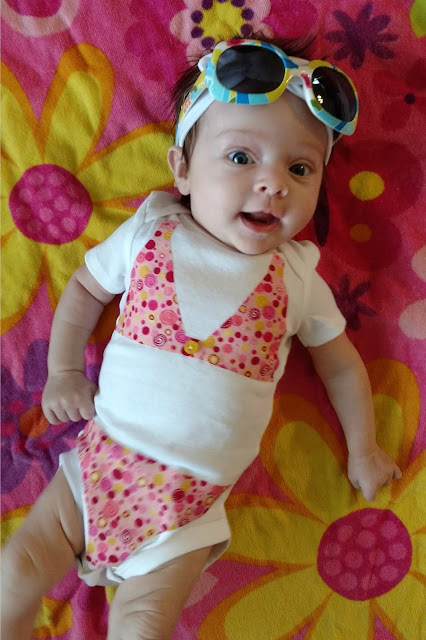
And that's it! You now have a darling little baby bikini onesie to keep for your own sweet girl or to give away. In all, the process took me about 30 minutes, but I could likely do it faster if I keep the templates I used and make more of the same size.
Who would you give this baby bikini onesie to?
With it being the second Wednesday of the month, that means it's time for the Inspire My Creativity link party! This month's theme is SOMETHING TO WEAR so you'll be seeing a lot of cute wearable items from all our co-hosts. Check them out below and then feel free to add your own project to the link up.
Shani | Sunshine & Munchkins
Anna | Practical and Pretty
Ali | Home Crafts by Ali
Cathy | A Boy and His Mom
Christine | Swordfights & Starry Nights
Meg | The Kusi Life
Candice | She's Crafty
Lauren | A Life of Love and Joy
Amy | Leap of Faith Crafting
Jaclyn | The Dotted Nest
Victoria | Dazzle While Frazzled
Sydney | Tastefully Frugal
Lindsay | See Lindsay
Julia | The Quiet Grove
Pam | P.S. I Love You Crafts
Marie | The Inspiration Vault
Next month, our theme is KID ACTIVITY OR CRAFT so come prepared to be inspired for this summer with your kids, armed with a whole list of fun activities!


Super adorable, I need a little girl. :)
ReplyDeletereally cute!If only I had girls...
ReplyDeletePrecious! I want to make a full size one for me, lol! Just kidding, but it would be perfect for my baby girl!
ReplyDeleteOh my heck- this is so dang cute!! Love it!
ReplyDeleteOh my this is too cute! It would make a great baby shower gift.
ReplyDeleteWhere was this when my girls were little babies!? This is so precious!
ReplyDeleteThis is so cute! I love it. ❤️
ReplyDeleteOh my goodness, this is SO adorable!! ��
ReplyDeleteAlright, I think this is officially the cutest swimsuit I've seen this year. So cute and looks really simple to whip one up.
ReplyDeleteOh my goodness this is such a cute idea!! So happy I found your blog. I will certainly be reading regularly. xoxo
ReplyDeleteHmmm... I need to find someone with a baby girl immmediately!
ReplyDeleteOh my goodness Shani, this is so stinkin' adorable, and it looks even cuter on her!
ReplyDeleteThis is just too cute!! So many fun things to make for babies these days. Since I'm done, I'll have to make some for baby shower gifts.
ReplyDeleteTOO cute!! That baby is getting so big! How did that happen?
ReplyDelete